Other Project Creation Tools
There are several other ways of setting up a Ktor server project. You can
If there are specific features that you require your server to have, these methods will probably be more convenient than bootstrapping with Amper, as they will add the required dependencies to the build configuration, as well as including relevant example code in the project.
Ktor Project Generator
This is a web-based tool, hosted at https://start.ktor.io/. It will create a Zip archive containing your Ktor project, which you can then download.
Try this out now. Visit the site and follow the instructions below:
-
At the top of the page, put something appropriate in the ‘Project artifact’ input field.
The last part of this identifier (after the final
.) is used as the project name and the name of the Zip archive that you will download.The first part of the identifier is used as a the package name for your code. Typically, this is a reversed domain name. You can leave it set to
com.examplefor the purposes of experimentation, but should use something more appropriate in real projects. -
Click on the Configure button to specified build system, Ktor version, Underlying server engine, and configuration file format.
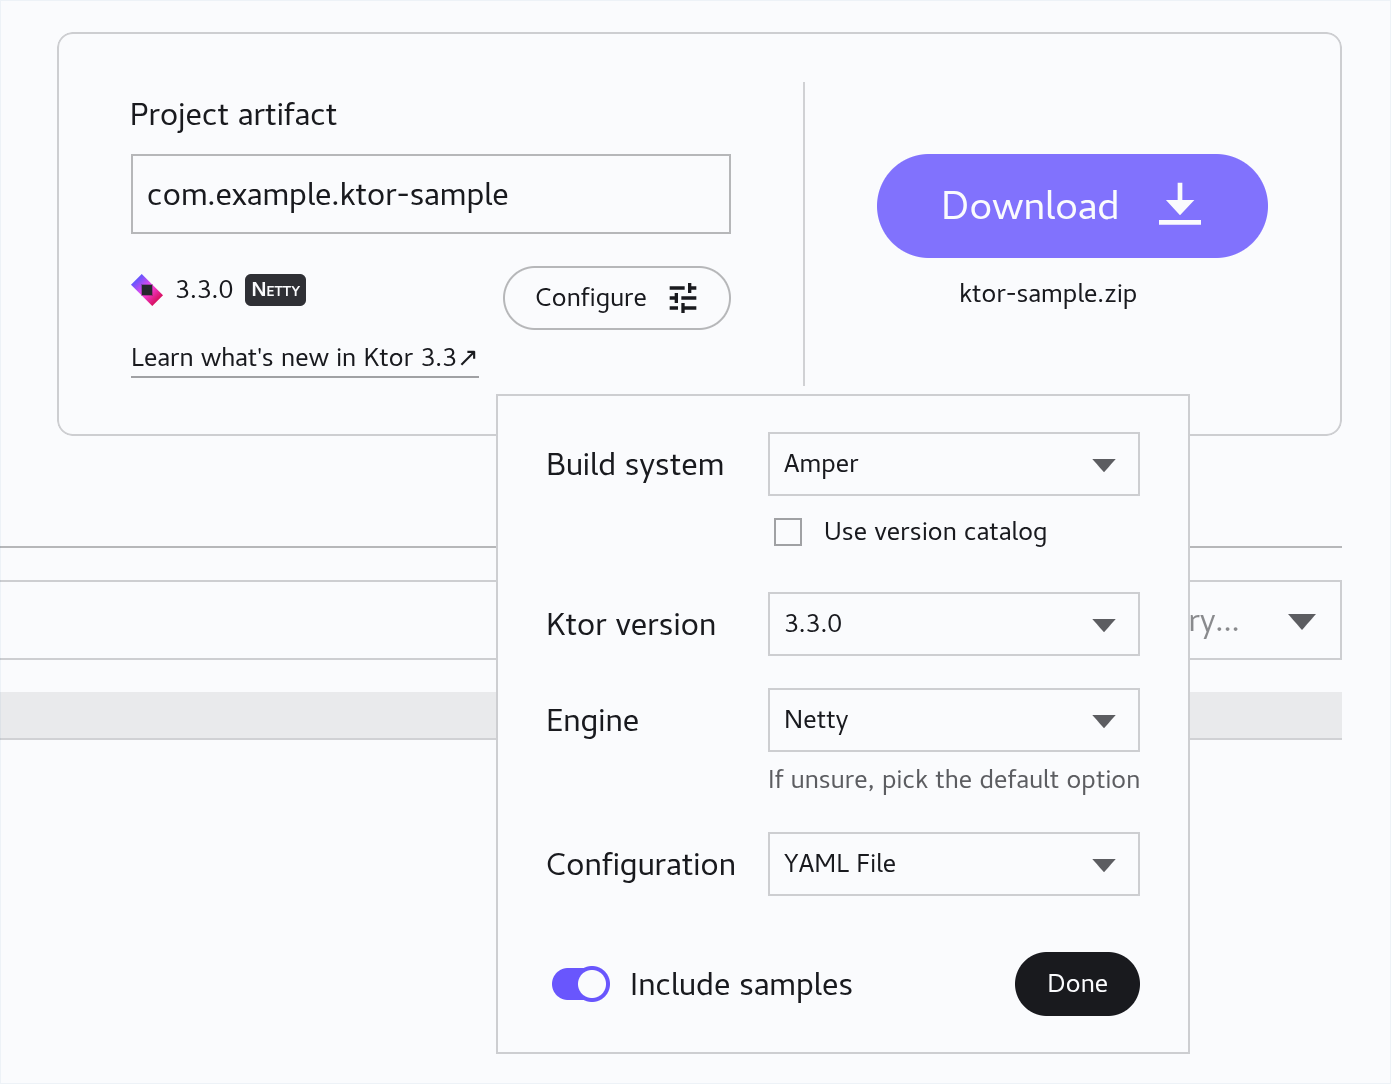
We strongly recommend setting the build system to either ‘Gradle Kotlin’ or ‘Amper’, as these are the two systems you are already familiar with.
Make sure ‘Ktor version’ is set to the highest available (currently 3.3).
You can leave the Engine set to the default of Netty, or change it to Jetty if you prefer.
Set the ‘Configuration’ option either to YAML File or HOCON File, as you wish. (HOCON is ‘Human-Optimized Configuration Object Notation’, a JSON-like syntax for writing configuration files. You may prefer this to the less explicit style of YAML.)
You can also indicate whether you want sample code to be included in the project or not. Leave this enabled for now, then click Done.
-
Select the ‘Plugins’ tab and scroll down the list of plugins. Select a plugin to see more information about it, and click the Add button to add it to the project.
-
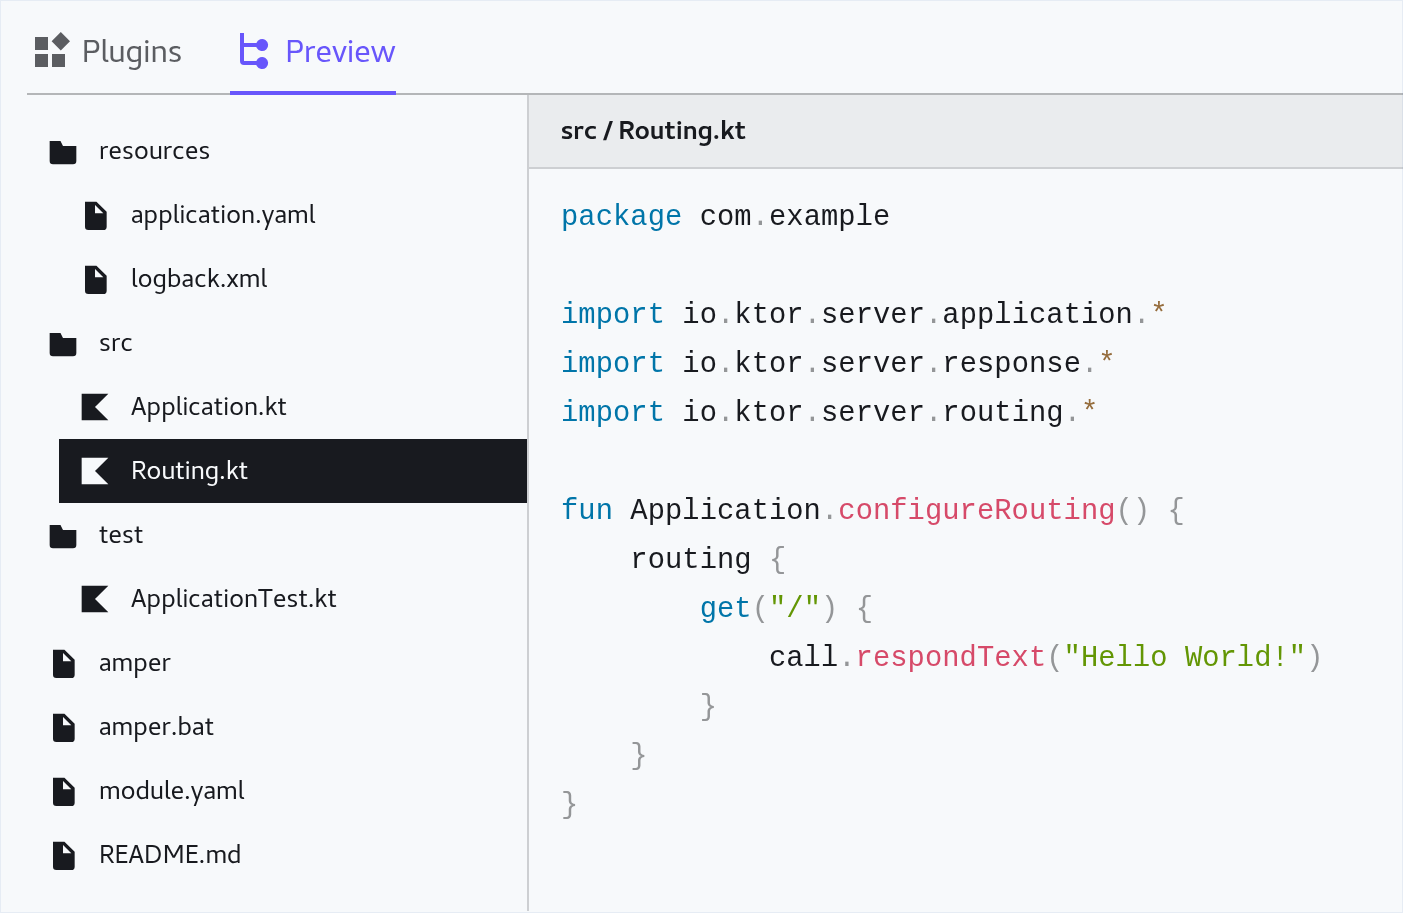
Select the ‘Preview’ tab to see a preview of the project structure. You can click on any file to see its contents.
-
If you are happy with the generated files, click the Download button at the top-right of the page to download a Zip archive containing your Ktor project.
Ktor CLI
This is a tool that you must download and run in the terminal, on your own PC. It provides equivalent functionality to the web-based tool, but may be a little quicker to use.
The tool works on Linux, macOS and Windows. See the Ktor documentation for further details on how to install and run it.
IntelliJ Ktor Plugin
If you have the full ‘Ultimate’ edition of the IntelliJ IDE installed on your own PC1, you can create a Ktor project via the following process:
-
On the Welcome screen, click the New Project button.
-
On the ‘New Project’ dialog, specify a name and a parent directory for the project, in the Name and Location fields.
-
In the Group field, specify a package name prefix.
Note: IntelliJ requires that you supply something here. You can stick with the default if you want, but in real projects it is better to use something unique (e.g, a reversed domain name).
-
If you don’t wish to use Netty as the underlying engine of your server application, select a different option from the drop-down box.
-
Leave the ‘Add sample code’ checkbox checked or uncheck it, as you prefer.
-
Under ‘Advanced Settings’, choose your preferred build system. We strongly recommend selecting either ‘Gradle Kotlin’ or ‘Amper’, as these are the two systems you are already familiar with.
Make sure ‘Ktor version’ is set to the highest available (currently 3.3).
Set the ‘Configuration’ option either to YAML or HOCON, as you wish. (HOCON is ‘Human-Optimized Configuration Object Notation’—a JSON-like syntax for writing configuration files. You may prefer this to the less explicit style of YAML.)
-
Click Next. On the next page of the dialog, scroll down the list of plugins, clicking the Add button for any that you want to include in the project.
-
When you’ve added all the plugins you require, click Create to finally create the project.
-
You can use the ‘Ultimate’ edition of IntelliJ for free if you have obtained a student license. ↩